


LUSTA HAIR


Your Ultimate Alternative Hair Style Guide
Inside this guide, you'll find step-by-step tutorials for creating everyday styles in your topper or wig.
If you're struggling with any particular hair style, please reach out to our team, we are more than happy to help you troubleshoot this.

Learn the Basics
Lusta Hair Toppers and Wigs are made with the finest quality human hair. This means, they act just like your own when styling or using heat tools. However, you may need to adjust your 'technique' slightly from how you'd manage your own hair.
When using heat tools, always have your tools set to 180°C or 350°F. If your heat tools don't give you this option, opt for a 'medium' heat setting.
Tools we recommend:
- Curler or straightener with ceramic plates/ceramic barrel
- Spray bottle for water
- Fine Tooth Comb, Round Brush and Paddle Brush (You can purchase these via our website)
- Mannequin head and T-Pins are ESSENTIAL. Watch THIS video to find out how to use them correctly.

TOPPERS
Ups-dos for Toppers
Watch the tutorials below and learn how to style your Lusta Topper in basic everyday hairstyles.

WIGS
Ups-dos for Wigs
Watch the tutorials below and learn how to style your Lusta Wig in basic everyday hairstyles.

LEARN HOW TO
Put on your new Lusta Hair
Just like anything, the more you do it - the easier it gets. The same applies to putting on your Topper or Wig. Watch the tutorials below to learn the tips and tricks.
Wigs:
Toppers:

LEARN HOW TO
Blend your Topper
Blending your Lusta Topper with your bio hair is a bit of an art form but once you get the hang of it, it's super easy!
Step 1: Line up your bio part line with your topper part line. Clip in the front two clips first, then the two side clips, then the back - scooping up a bit of your bio hair with each clip.
Step 2: Place one hand on top of your head to secure the topper. With the other hand use a blending brush to expose your bio baby hairs.
Step 3: If you are seeing a gap between the topper hair line and your own hair line, spray your Clingy Fibers to erase the gap.

LEARN HOW TO
Heat Style your Piece
Lusta Hair Toppers and Wigs are made with the finest quality human hair. This means, they act just like your own when styling or using heat tools.
When using heat tools, always have your tools set to 180°C or 350°F. If your heat tools don't give you this option, opt for a 'medium' heat setting.

LEARN HOW TO
Change the Part Line
Did you know all Lusta hair pieces have a multidirectional part line? This means you can adjust the part line on your piece to match your natural part line.
The easiest way to change the part line on your piece is on an mannequin head, secured by t-pins.
Step 1: Wet the top of the piece.
Step 2: Using a fine tooth comb, move the part line as you would with your normal hair.
Step 3: Blowdry the new part line in place, angling the air downward to force the hair to sit flat.
Step 4: Once the piece has dried, you can transfer it to your own head and continue moulding the hair with your fingers, comb and blow dryer.

LEARN HOW TO
Add or Remove Clips
You can easily customise your topper cap but adding, removing or relocating the clips. All you'll need is a needle, thread and scissors.
To remove topper clips, start by ensuring all the topper clips are closed. Using a small pair of scissors, simply cut the thread that is holding the topper clip to the topper.
To add topper clips, position the clip in the desired area, aligning it with the existing clips. Using a needle and thread, secure the top right corner with three stitches, then repeat on the bottom right. Pass the needle under the clip grip and repeat the same steps on the other side.

LEARN HOW TO
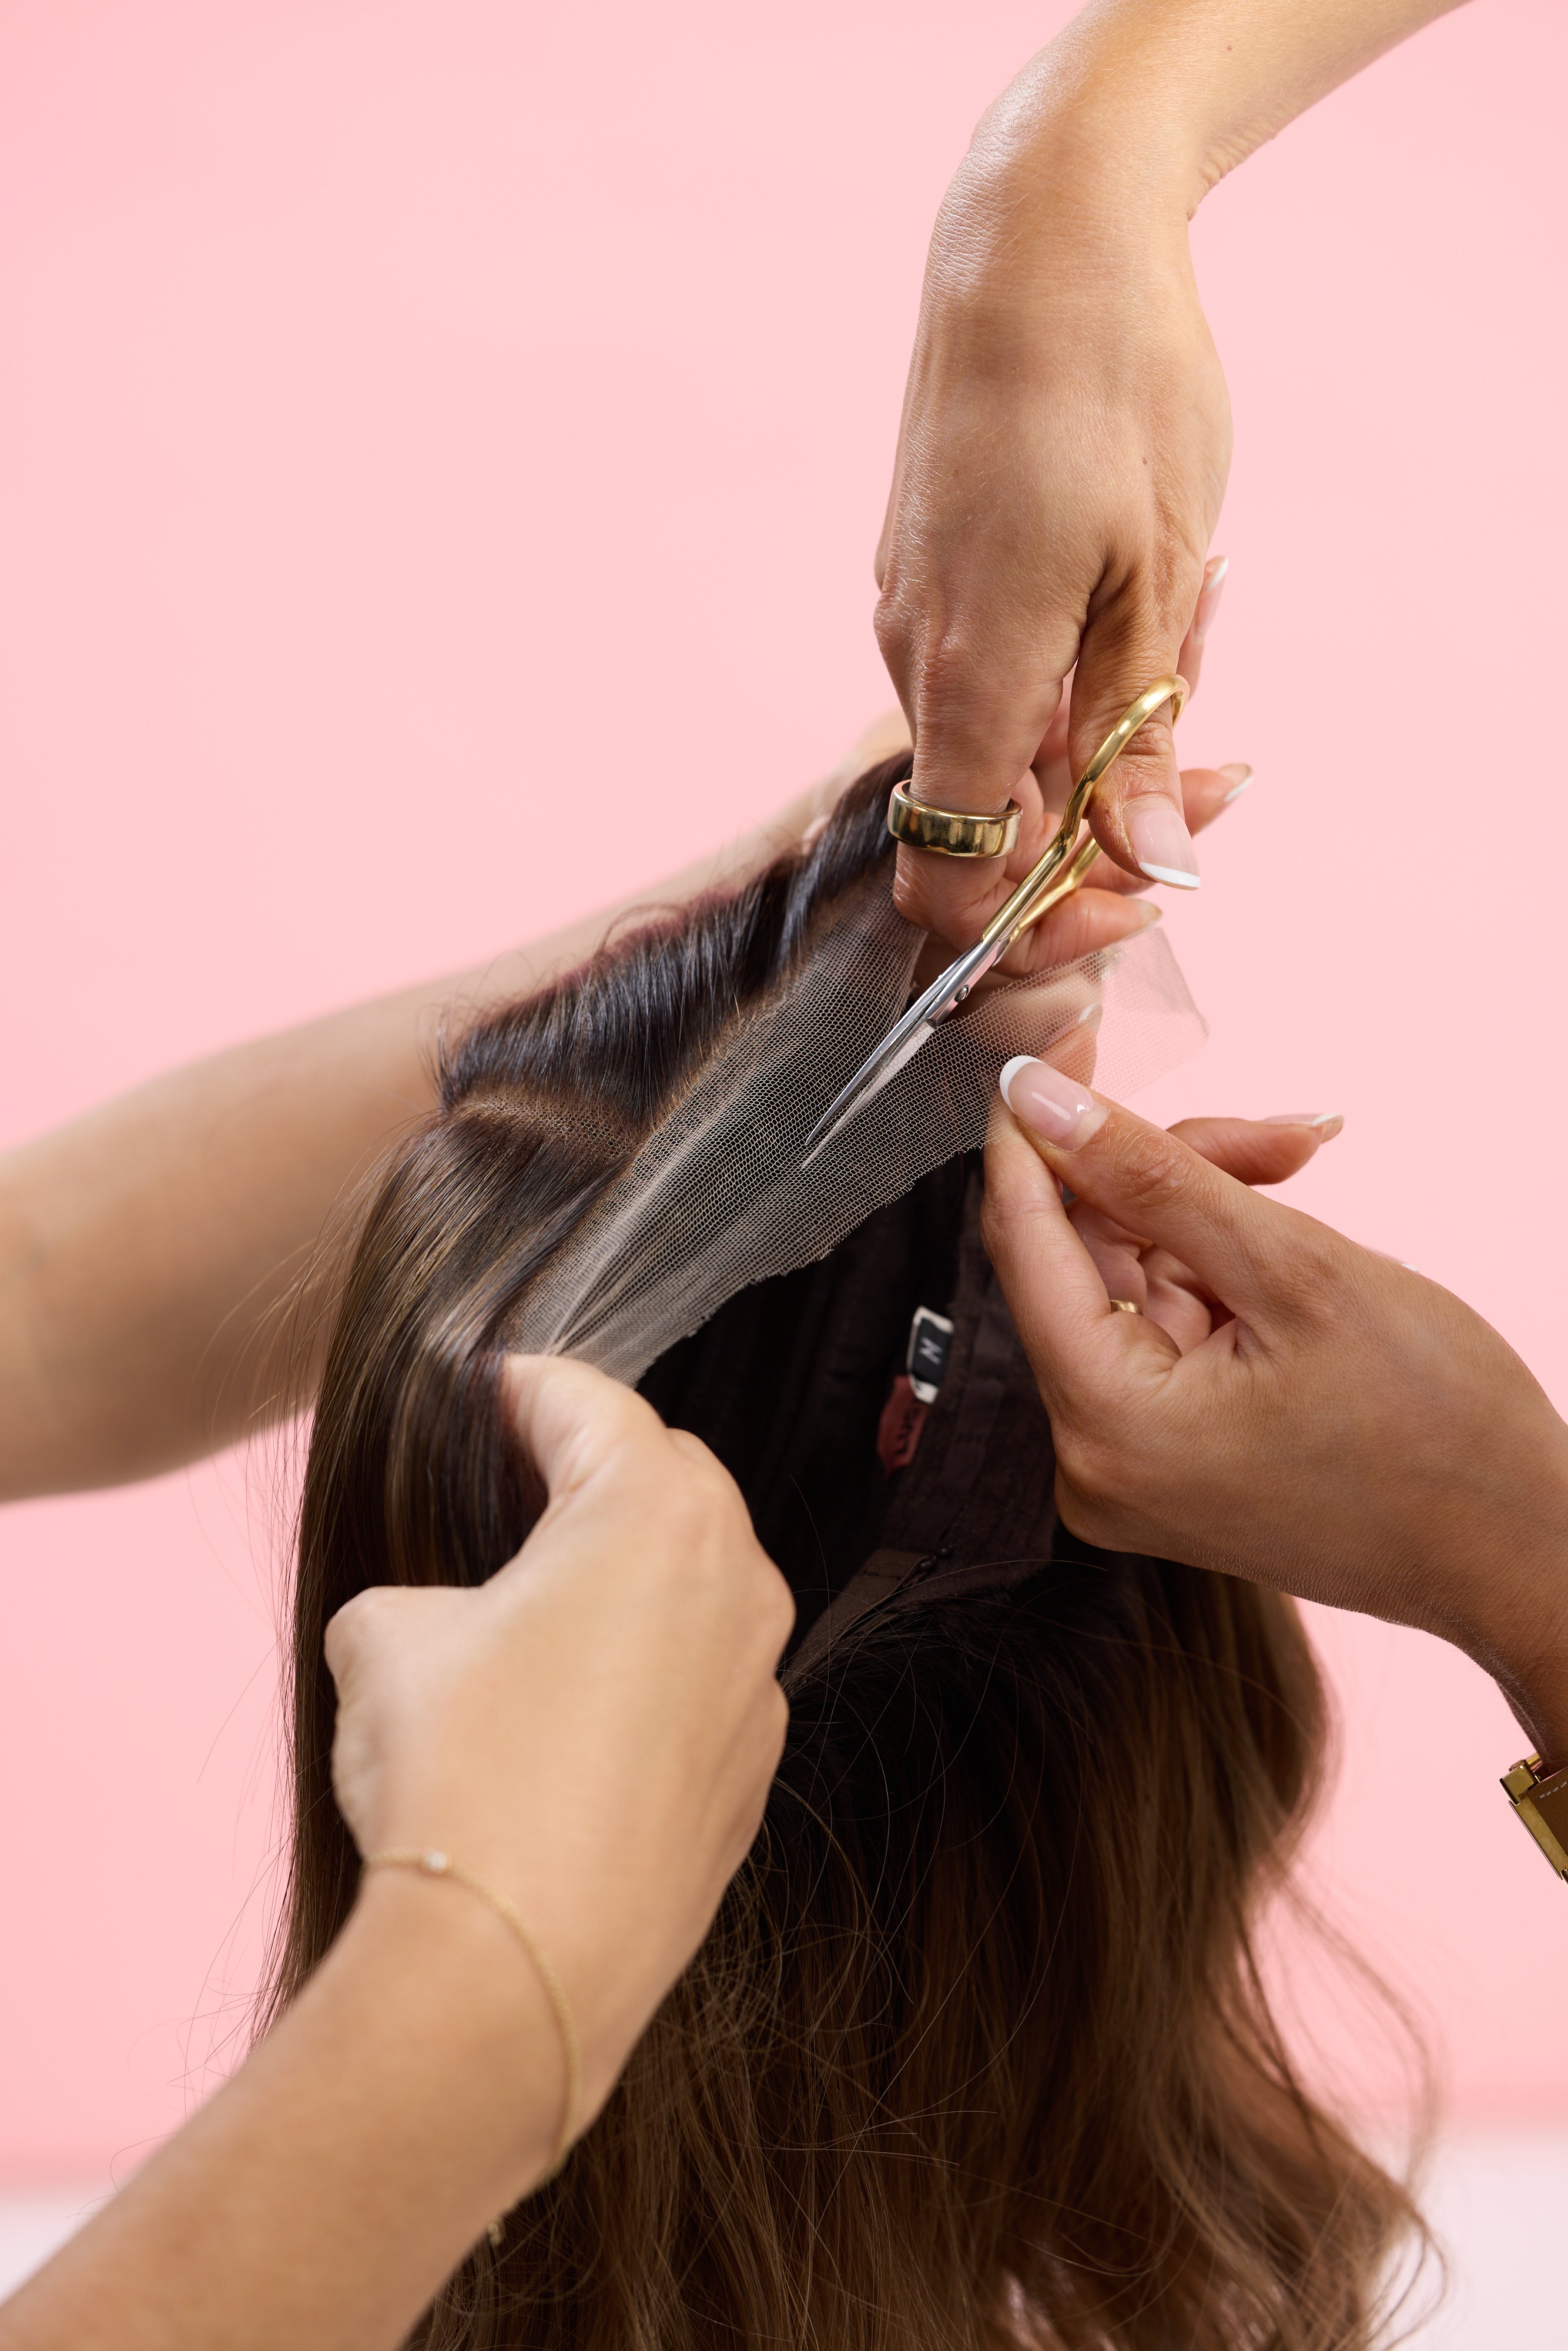
Cut the Lace
When it comes to cutting the lace on your piece - you've got two options:
Option 1: We can cut it for you. Just select 'cut the lace for me' when you add the piece to your cart.
Option 2: Cut the lace yourself at home, with the help of the tutorial below.
Important note. Once the lace has been cut, the piece cannot be returned. This applies to self cut or Lusta cut lace. Please read our returns policy for more information.
How to cut the lace at home:
Step 1: Pull the hair away from the lace using clips or a hair.
Step 2: Beginning at the edge of the lace carefully cut along the lace leaving at least 1 cm or half an inch of lace on the wig. Be sure to follow the curve of the wig. If it's your first, leave extra lace as you can always trim if back further later. Your lace does not need to be perfectly straight.
Learn how to Cut the Lace
LEARN HOW TO
Use how a Topper Grip
Whilst most of the time a Topper Grip is not required, some customers will use a topper grip to achieve additional security at the front, especially when wearing hair up in a ponytail or bun.
Step 1: Clip the Topper Grip into the front of the topper.
Step 2: Place the topper on your head and slide the headband around your head.
Step 3: Fasten the back clips for extra security.

LEARN HOW TO
Use how a Wig Grip
Whilst most of the time a Wig Grip is not required, some customers will use a wig grip to achieve additional security during strenuous or high impact activities.
Step 1: Place the wig grip on your head with the Lusta logo facing outwards.
Step 2: If you have your own bio hair secure your hair into a low bun, ponytail or plat.
Step 3: Holding the ear tabs and facing the wig away from you lean down and dive your head into the wig.
Step 4: Once your wig is on, you can adjust your wig as normal by shimmying back and forth with the ear tabs.
Helping you care for your wig or topper
Frequently Asked Questions
Can I use hairspray or styling products?
Yes! However, for most styles, hair spray is not necessary. The hair quality we use at Lusta means that styles (e.g. waves, curls, etc.) will hold very well in the pieces. Most wearers can go 4-6 weeks with the same style.
If you feel you need hairspray to hold a particuarly style, we recommend washing out thoroughly after use. Most salon-grade brands of hairspray are okay to use on Lusta pieces. However, we recommend Matrix High Amplify Volume Hairspray or De Lorenzo Vapour Mist.
Should I use a deep conditioning treatment?
We recommend using a deep conditioning treatment every 2-3 washes. Especially for lighter coloured pieces (which are more heavily processed) giving your piece some extra nourishment and hydration with a deep conditioning treatment will do wonders!
We recommend the following products:
What about purple shampoo?
To keep your blonde topper or wig looking its best, we recommend using a purple shampoo every 2-3 washes. Make sure to evenly apply your purple shampoo for best results. We love the Milkshake Silver Shine Shampoo.
I can't find the products you've suggested!
Can't find a product? Get in touch with us via Instagram message or Email and we'll help you find the perfect product!
Can I heat style my piece?
You can use heat (blow dry and straighter/curling) on your human hair topper/wig but be sure to use a low heat setting. The less heat you use, the longer your piece can feel like new. It is recommended that your piece is styled on a block head (mannequin head) with clamp for ease of use. A topper should be pinned down with T Pins. The pins should be inserted carefully through the clips. Do not pin through the silk area. A wig can sit on a small mannequin head - ensure that you are never stretching a wig to fit on a larger mannequin head. Do not pin through any silk area or silicone area. Lusta recommends the use of heat protector styling products.
Can I use colour/root sprays on my piece?
It is not recommended to use colour sprays or root sprays as this will discolour the silk/lace material and can ruin the texture of the hair.
How should I store my piece?
Store your piece on a mannequin head when it’s not in use to help keep its shape. Do not store your piece in direct sunlight, as this can cause the colour to oxidise (lighten). Store with the clips closed and tangle-free. Any size mannequin head will work for toppers. Ensure you use a correct mannequin head size for your wig, so it is not being stretched whilst stored. Your piece can also be stored in a box if you don’t intend to hang out every day.
How should I brush my piece?
When brushing, be mindful not to tug too hard on any of the tangles. Go gentle. Use a paddle brush, not a fine-tooth comb. Always start brushing from the bottom of the hair and gently work your way up. Avoid combing the hair when it’s wet as the knots can loosen over time.
Any cutting/colouring advice for my stylist?
If you are taking your Lusta piece to your hairdresser for a cut, here are some tips to share with them.
- Avoid blunt cuts
- Avoid the use of 'thinning scissors'
- Cut the length while it’s being worn on your head
- For fringes/bangs, ensure your bio hair is all pinned back before cutting
- Thin the hair out by sectioning out layers, so the top doesn’t end up too heavy and 80s-mullet-like (even though we hear retro is making a comeback!)
If you are taking your Lusta to your hairdresser for a colour, here are some tips to share with them.
- Use highest quality salon grade colour products
- Always apply a test strand before performing any colour work
- It is recommended not to lighten or bleach the hair
- Lighter toppers can be darkened by a trained stylist to add darker roots, lowlights or a reverse balayage. It is suggested to use up to 1.9% peroxide.
- Natural, unprocessed hair can be lightened at your own risk by a trained stylist with alternative hair experience, as the dark colours can go orange very easily. With lightening a topper/wig it is suggested to use no higher than 3% powder lightener/peroxide
- If colouring, do not leave the piece unattended as they take colour very quickly. Check colour progress regularly.
- Be careful with colour around the silk scalp material. If concerned, Vaseline petroleum jelly can be used to coat the silk material and washed out later. Alternatively, we suggest applying a test patch of colour to the back of the crown silk area. Please rinse colour out thoroughly. In the unlikely instance where the silk top stains, it should come out after a few washes and with time, but just caution this.